How to Craft a Cornhole Board: A Comprehensive Guide
Creating your own cornhole board is a rewarding project that can provide hours of outdoor entertainment. In this guide, we will walk you through thehow to make a cornhole board step by step. One of the first stages is “Cut the Skirt Boards,” which sets the foundation for your project.
How To Make a Cornhole Boards
To build cornhole board, you will need the following materials and tools:
Materials
- (2) 24″ x 48″ pieces of 1/2″ plywood for the surface
- (4) 2×4 x 48″ for the frame
- (4) 2×4 x 21″ for the frame
- (4) 2×4 x 11-1/2″ for the legs
- 1-lb. box of 1-5/8″ deck screws
- 1-lb. box of 3″ deck screws
- (4) 1/2″ x 4″ carriage bolts with (4) washers and (4) wing nuts
- Wood putty
- Exterior-grade paint
- Primer
Tools Needed
- Jigsaw
- Measuring tape
- Compass
- Drill with a drill bit and Phillips-head screw bit
- 1/2″ drill bit
- Clamps
- Circular saw
- Random orbit sander
- Paint roller
These materials and tools will allow you to construct a cornhole board following the provided guide.
Cornhole board DIY Steps
Cut the Skirt Boards
To begin your cornhole board construction, the first step is to cut the skirt boards. The skirt boards are the sides of the cornhole board that form the frame and provide structural stability. You will need two 2×4 wooden boards, each measuring 48 inches in length. These boards will serve as the top and bottom skirts.
Using a measuring tape and a pencil, mark 48-inch segments on the boards. Ensure your measurements are precise to maintain symmetry in the final board. After marking, use a circular saw or a miter saw to cut the boards along the marked lines. This will result in two 48-inch long skirt boards.
Once the skirt boards are cut, you are ready to move on to the next step in creating your cornhole board: “Cut the Handle Slots.”
Cut the Handle Slots
The handle slots are an essential part of the cornhole board design, allowing for easy transportation and storage. To create these slots, follow these steps:
Round Over the Slots
Rounding over the slots not only enhances the visual appeal of your cornhole board but also provides a comfortable grip when carrying it. Here’s how to do it:
Drill Pocket Holes and Assemble the Skirt
To begin your cornhole board project, you’ll need to assemble the skirt, which is essentially the frame of the board. This frame is crucial for maintaining the structure and stability of the board.
Start by drilling pocket holes into the wooden boards. Pocket holes are hidden, angled holes that make it easier to connect pieces of wood securely. To do this, you’ll require a pocket hole jig, a specialized tool that ensures precise hole placement. Place the jig on the board, drill the holes, and repeat this process for all the boards you’ll be using to create the skirt.
Once you’ve drilled the pocket holes, it’s time to assemble the skirt. Position the boards to create a rectangular frame, ensuring the pocket holes face inward. Use wood screws to secure the joints, creating a sturdy and robust base for your cornhole board.
Make the Legs
The legs are essential for propping up your cornhole board at the ideal angle for gameplay. To craft these, you’ll need two pieces of lumber for each leg.
First, trim the lumber to the desired length for your legs, typically around 12 inches. Precision is key here, as you want both legs to be the same length to ensure even weight distribution.
Cut in a Shape
To give your cornhole board a personal touch, consider cutting the leg ends into a unique shape. Popular options include a tapering angle, rounded edges, or even a specific design that reflects your personality or interests.
Use a jigsaw or a circular saw to carefully cut the wood into your chosen shape. This step allows you to add character to your cornhole board while maintaining its functionality.
Finish the Legs and Skirt
Now that you’ve shaped the legs, it’s time to finish them. Question is how to finish corn hole board. Follow these steps to make custom cornhole board.
Sand the legs with medium-grit sandpaper to smooth any rough edges and create a polished appearance. This not only enhances the aesthetics but also ensures the safety of players by reducing the risk of splinters.
For a sleek and durable finish, consider staining or painting your cornhole board’s legs. This not only adds a protective layer but also allows you to match the legs to the overall design of your board.
In addition to the legs, you can also finish the skirt by sanding it down and applying a protective coat, such as polyurethane, to shield it from the elements. This step is crucial to ensure the longevity of your DIY cornhole board.
Make the Boards
To begin your cornhole board construction, you’ll first need two sturdy wooden boards. Typically, these boards measure 2 feet by 4 feet and are made from materials like plywood or medium-density fiberboard (MDF). Start by carefully measuring and marking the dimensions. Then, using a circular saw, cut the boards to the desired size, ensuring they are identical.
Cut Holes
Once your boards are cut to size, it’s time to create the holes for the cornhole bags to pass through. The regulation size for the hole diameter is 6 inches, and it should be positioned 9 inches from the top and centered 12 inches from each side of the board. Use a hole saw or jigsaw to carefully cut out the holes, ensuring clean and smooth edges.
Attach Skirt
Adding a skirt to your cornhole board not only reinforces the structure but also enhances its overall appearance. Cut four pieces of 2×4 lumber to the length of each side of the board. Attach these pieces to the sides of the board using screws or nails, leaving the top edge flush with the board’s surface. This frame, or skirt, should be positioned about 1 inch from the edge.
Mount the Legs
For a stable and easily portable cornhole board, you’ll need to attach foldable legs. Each leg typically measures 2×4 lumber and should be approximately 12 inches long. Attach them to the back of the board, ensuring they are perpendicular to the playing surface. You can use hinges to make the legs foldable for convenient storage and transportation.
Add Bag Storage
To complete your cornhole board, consider adding a convenient bag storage solution. This can be achieved by attaching a small shelf or platform to the back of the board, just below the playing surface. This shelf provides a place to store the cornhole bags when not in use, ensuring that you have everything you need for a quick game.
How to Paint Cornhole Boards: A Step-by-Step Guide
Painting cornhole boards is a fun and creative way to showcase your style and make your game set truly one-of-a-kind. In this step-by-step guide, we’ll walk you through the process of painting your cornhole boards from start to finish.
Materials You’ll Need:
Steps of Painting Cornhole Boards
Prepare the Cornhole Boards
Start by inspecting your cornhole boards for any rough spots, splinters, or imperfections. Use sandpaper to smooth out these areas, ensuring a clean and even surface for painting. Remove any dust or debris with a clean cloth or brush before moving on to the next step.
Apply Primer
Priming the boards is an important step that helps the paint adhere better and ensures a more durable finish. Follow the instructions on the primer can and apply an even coat to both sides of the boards. Allow the primer to dry completely before moving on to the painting stage.
Design and Tape
Now comes the fun part – designing your cornhole boards! You can choose to go with a simple design or get as creative as you like. Use painter’s tape to mark off the areas you want to paint, creating clean lines and sharp edges. This is especially useful if you plan on painting multiple colors or intricate designs.
Paint
Using your chosen paint colors, carefully apply the first coat of paint to the designated areas. Start with lighter colors and work your way to darker shades if necessary. Allow each coat to dry fully before applying additional coats. Depending on the desired opacity, you may need to apply multiple coats of paint.
Remove Tape
Once the paint is completely dry, gently remove the painter’s tape to reveal your crisp lines and clean edges. Take your time during this step to avoid any accidental smudging or peeling of the paint.
Seal the Artwork
To protect your masterpiece and ensure its longevity, apply a clear coat sealer. This step will not only provide a glossy finish but also protect the painted surface from UV rays, moisture, and general wear and tear. Follow the instructions on the sealer can for the best results.
Let It Dry
After applying the clear coat sealer, allow your cornhole boards to dry fully. This may take a few hours or even overnight, depending on the product used. Avoid placing any objects on the boards or exposing them to moisture until they are completely dry.
Enjoy Your Custom Cornhole Boards
Once your cornhole boards are dry and ready, it’s time to enjoy your newly painted set! Gather your friends and family, set up the boards, and have a blast playing the game on your personalized creation. Your unique design will undoubtedly be a conversation starter at your next outdoor gathering!
Wrapping Up
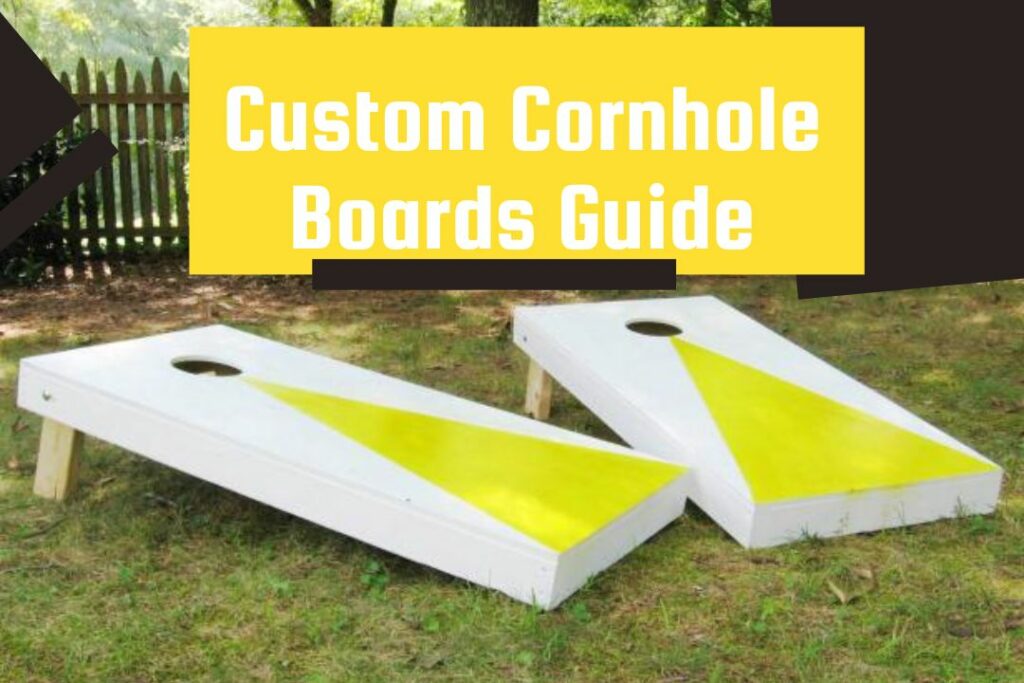
By following the steps outlined in this guide, you can create custom boards that meet your specifications and personal style. Whether you are a seasoned woodworker or a beginner, this project is accessible and can be completed with basic tools and materials. From measuring and cutting the plywood to assembling and painting the boards, each step contributes to the final product. Once you have finished building your cornhole boards, you can look forward to many hours of fun and friendly competition with friends and family. So why wait? Start building your own cornhole boards today and get ready to have a blast at your next backyard gathering or tailgate party!